Thursday, July 7, 2022

Dreamland Bendy cards

 Hi everyone!

Today I have for you two different version of bendy cards made using the beautiful Moonlight Bella paper collection from Papericious. 


Both the cards can be folded flat and sent through mail in a normal envelope.

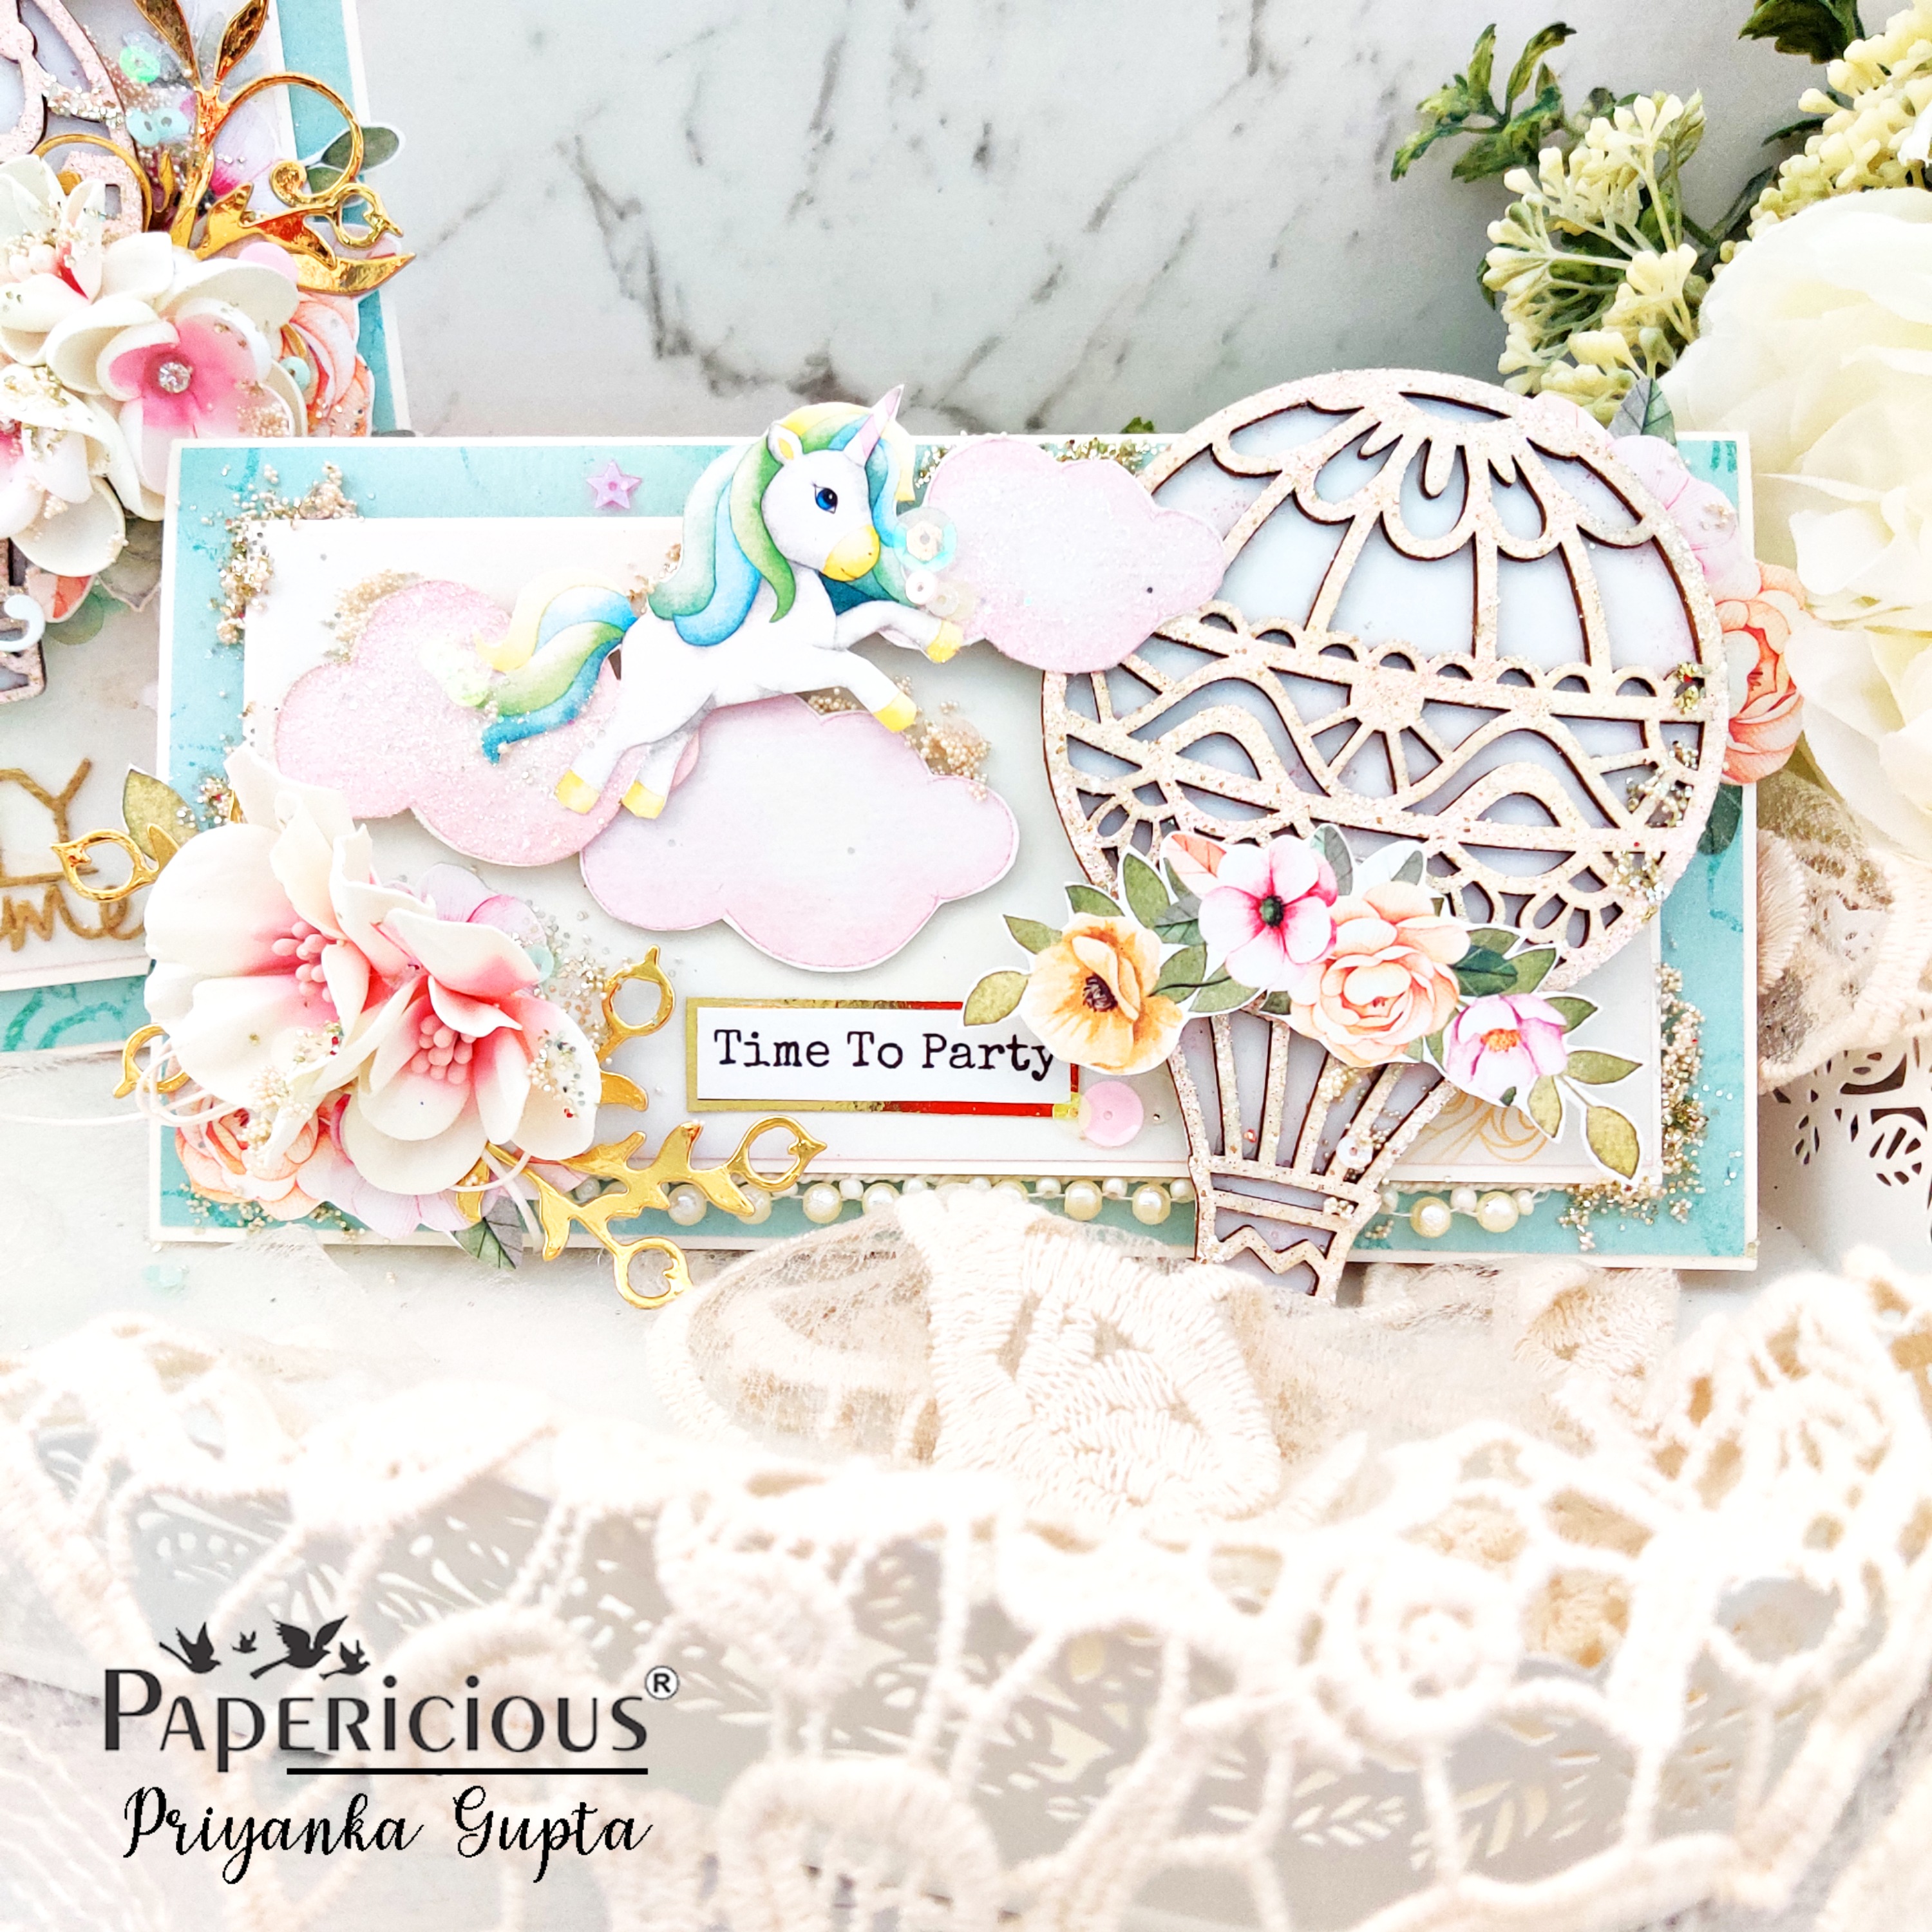
The first card (unicorn in the clouds) has one bendy layer and measures 6x6 inches.


To make this card, first I cut a piece of Kraft cardstock that measures 6x6 inches and scored it at 3 inches only on one side. Fold and burnish.
Then cut another piece that measures 1.5x 7 inches. Score at 0.5 inches on both sides to make a belly band. Take a pencil and keep it on one end of this piece and make a bend on this piece. Stick it on the bottom of our card base.
Now stick two pieces of pattern paper(5 7/8 x 2 7/8) on the card base and also on the belly band( (5 7/8 x 1 3/8).
Cut two more pieces- 4 1/4 x 1 1/2 inch. Score at 1/2, 1 7/8, 2 3/8, 3 3/4 inches. Stick this piece on the card base keeping only 1 inch above the base belly band.
Another piece will measure- 3 1/2 x 1/2 inch. Score at 1/2, 1 1/2, 2, 3 inches. Stick this piece at 1 3/4 inches from the top of the card base. Now just place your elements from the motif bundle.
Top of with sentiment and some chippies ( gold sparkle heat embossed) on the belly band as shown in the card. In the end don't forget to put crystal clear glitter by Papericious.
Also put white cardstock at the back of the card base so that one can write a message on the card. Then your card is ready!!!


The second card ( Dreamland) has two bendy layers which fold over each other and can be unfolded to get another view of the inside. This one measures 5x7 inches

To make this card take a Kraft cardstock that measures 5x7 inches. Stick a pattern paper on top. Take two more pieces of Kraft cardstock that measures 2x7 and 3x7 inches. Score at 1/4 inches on both the sides of both the pieces. Draw a pencil line on both the pieces to give it a shape of hilly grasslands. Cut pattern papers of this shape as well. Stick on top.

Now stick one folded end of both the pieces on the opposite side of the card base so that they overlap.( One on the left and one on the right side).

Now keep the bigger bendy layer on the base and make a slit where that piece ends. Insert the 1/4 inch edge in the slit and do the same for the small bendy layer. Now layer your elements from the motif bundle and top with a sentiment.


This picture above shows the inside layer when the top bendy layer is removed

Both of the cards have space to write the message at the back.

They can stand on their own and can be a perfect home decor piece as well.

I am sure these will surely bring smile on your face either you are the sender or the recipient of these beautiful cards.


Here is the list of materials used-

Kraft cardstock

Moonlight Bella paper from Papericious

Moonlight Bella motif bundle from Papericious

Golden mirror cardstock

Birthday sentiments chippies from Papericious

Papericious Crystal clear glitter

Gold sparkle embossing powder 


Thanks...

Priyanka

Sunday, June 12, 2022

Magical Slimline cards

 Hi everyone!

Today I bring to you two slimline cards, both of them being in different orientation, one is landscape and the other is potrait. I have used moonlight bella papers and motif sheet bundle from Papericious. The hot air balloon chippies are also from Papericious itself.

The idea behind these cards was to play with the same elements in different orientation


The card base is 8x4 inches. Then I have layered a paper paper from the collection. The second layer measures 3x7 inches again layered with pattern paper from the collection.
Then I heat embossed the hot air balloon chippies in shabby pink color and made an arrangement around it (this being the focal point of my card). Added the clouds and unicorns, some lace and handmade foamiran flowers. Topped with the sentiment ( party time heat embossed with golden color).
In the end I have put some art balls, sequins and glitter to give it some bling and a complete look. Take a look at the individual cards-


These are the close up pictures to give you a view of the detailing-


I hope you guys like these cards and they give some inspiration to start your week...
Supplies used from Papericious are as follows-
1. Moonlight bella paper pack-
2. Moonlight bella motif bundle-
4. Party sentiment chippies-
6. Sequins-

Thanks for stopping by...
I hope you have fun playing with this collection!!!
Love
Priyanka

Saturday, April 9, 2022

Spring themed Mixed media tag

 Hello everyone!

I am Priyanka from Memory Keepers and today I am gonna share with you my latest creation of a mixed media spring themed tag and if you scroll down, you will find a pictorial on how I made this tag. Do let me know in the comments how you like it ⬇️⬇️⬇️ 


Step by step instructions-

1. Take two pieces of Chipboard around  7x3.75 inches and cut them in a tag shape.

2. Stick them together

3. Then take small strips of Chipboard( approx 0.75 inches) and paste them on top of the tag as shown in the picture below, making sure you cut the top left and right corners just like the base. This should look like a wooden plank now.


4. Then apply two coats of white gesso on the whole tag and make sure to cover the grooves as well. Also apply one coat of white gesso on the clay pieces. Let it dry.


5. Then take any texture paste and add sand to it( you can also take sand texture paste if you have).

6. Then with the help of palette knife, apply a thick coat on the whole tag. Remove the excess paste from the grooves with the knife itself so that it is highlighted. Let it dry.

7. Apply shades of brown color( diluted) on top of the tag and let it dry

8. Then sprinkle some dry moss powder on top of the tag and use a brush with water to spread it everywhere.

9. This will give it a shade of yellow and prepare the base( as I wanted it). It should look something like shown in the picture below.


10. Apply a thick coat of gel medium here and there on the tag

11. Sprinkle the green moss powder on the gel medium so that it's covered as shown in the picture below


12. Now take the clay pieces ( I have divided one step into two) and start building the structure on both sides as shown. Paste the flower clusters before and above the clay pieces to make different layers. Stick them with the help of glue gun.


13. Stick two small pieces of wooden texture paper ( distressed and inked with black soot)

14. Then stick other clay pieces on top of the paper as shown in the picture below. You can color the bigger clay pieces with green watercolor so that it merges with the background.


15. Start layering the flower clusters and butterflies here and there using foam tape or leftover chipboard pieces

16. Also apply a layer of brown water color on top of the clay pieces only on the raised edges


17. Then build up the layers using more flower clusters on both sides to give it a balanced look. Keep adding until you are satisfied


18. To connect both the sides and use a focal point I have used 3D vintage clock chippies in the center which is embossed with black color on the base. I have put more flower clusters on top of the clock chippies.


19. Then stick two paper flowers around the clock and complete the look with filler flowers. This gives it a more realistic look and binds the whole composition.


20. Put more butterflies, top with a sentiment and put some golden pearls

Ta-da...our tag is ready!!!)

Take a look at some close up pictures of the tag😍🥰


Do tag me if you recreate this... Would love to see your creations🥰🥰


Friday, August 7, 2020

Mummy's boy mixed media layout


Hi everyone!
This is Priyanka from Memory keepers By Priyanka. I am so happy to be the guest designer for prika for the June challenge- All little baby things
Let me take you through the process-
First I selected the paper and tear it as shown in the picture. Then I tore the corrugated paper according to my pattern paper and placed them on a  12x12 chipboard. Then I inked the edges of all of them with walnut stain. Also ink the lines on the corrugated paper as well.
Then I pasted the corrugated paper as shown on the chipboard.


After that I stick my pattern paper as shown in the picture. Then apply clear gesso on the pattern paper and let it dry. Then I took the texture paste and applied it through a stencil in various places as shown. Let it dry. I also applied the texture paste on the corrugated paper with the fingers here and there so that it doesn't look so plain.


After that I used two shades of pigment powder named blue russet and aqua blue (from Australia brand) and sprinkled them on the design. I used water spray to move the color and dabbed off the extra till I got the desired effect.


Then I took two large piece of cheesecloth and colored it with blue russet pigment powder with the help of water. Let it dry.
After that I collected all my fussy cut elements and the photo of the baby and tried to place all the elements till I was satisfied. After that I backed my photo on pattern paper and made it dimensional  using left over chipboard pieces and pasted it on the layout. Then I tucked the cheesecloth around the photo using the glue gun. Then I pasted my flower die 
cuts, foliage and prima flowers and started to give a shape to my layout. I also used some chipboard element from expressions craft and pasted it on top left corner and bottom right corner of the photo. Then I pasted some fussy cut balloons, bunny and build around my main focus of the layout. After that I used the stamp to give more interest to my layout here and there randomly and made a check design. Then I pasted the mummy's little boy chipboard piece on the right middle part of the layout.


After that I found the right corner a bit empty so, I used the mommy and baby bunny elements that came with the paper pack and used them there with a piece of chippies and cheesecloth.

In the end I used some art stones and randomly used them to add more texture and grace to my project and sprinkled some sparkling dust in between the spaces. Then I added glitter to the balloons and used glossy accent on the balloons and the bunnies. Finally I added some fairy mix sequins from dress my craft randomly. Then I topped the layout with a sentiment that perfectly matched with the theme for this month challenge.
Here are some close up pics for you to see the details and final piece-


We are done!
I hope you guys find some inspiration from this project and like the way I have done this.
List of supplies used-
Kaisercraft little treasures paper collection
Clear gesso by ranger
Paper texture paste from crafTangles
Stencil from Craft treat
Chippies from expressions craft and mudra
Art stones from expressions craft
Flowers from prima
Sequins from dress my craft
Log Stamp from kaisercraft
Pearl ex from jacquard(Australian brand)- sky blue and blue russet (pigment powders).
Thanks for reading.
Love
Priyanka from memory keepers